Turn your panoramas into eye-catching miniature planets in minutes, using Photoshop or your favorite graphics editor.
We really like to work with Photoshop and all the effects that this software brings on Photoshop CC. For this photo experiment, we are going to work with ‘Filter/Distort/Polar Coordinates’.
5 Simple Steps to Making Panorama Worlds
The technical name for this technique is “stereographic projection” but don’t let the name put you off – it’s very simple to do and only takes 5 minutes. I’ll be using Photoshop in this example but you can do it in most graphics programs, including GIMP, which is free.
- Deform the image so that it has the same height as width
- Flip it vertically
- Apply the polar coordinate filter
From there, it will only be necessary to touch up a bit with the buffer to clone the joint area and make the final adjustments that are deemed appropriate.
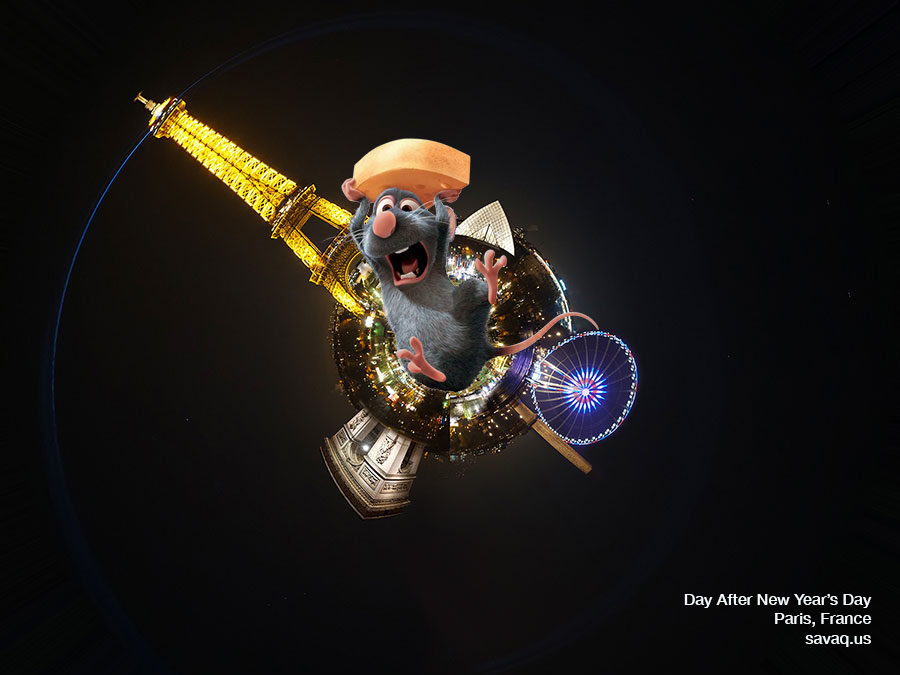
In the following illustrations, you can see photographs obtained by this technique
Step #1: Use a panoramic photo
The best results to create a ‘Tiny Planet’ is with panoramic photos. Keep in mind that the horizon line from left to right must coincide, this will create a nice and perfect planet. I didn’t have a panoramic photo for this experiment, but I have a good landscape picture, so I’m going to duplicate the image and create a cool landscape image.

Step #2.- Photo Composition
This step is really important because here we will create our composition. Design Suggestion: Use your creativity and bring more elements to your composition, elements that you think will look good with your main concept.
Organize and separate buildings and structures in your landscape image.

In this trip, I took a group of pictures of different structures of Paris. Crop each monument or iconic building and place them on your new panoramic image.

Adobe Photoshop CC: Each element has its own layer (The Place of the Concorde, the Arc de Triomphe, and the Louvre Museum).

Step #3: Image Size
Resize your image. Go to Image > Image Size > Uncheck the ‘constrain proportions” in the Image Resize option.


Same proportions (Width and Height).

No worries! Your image will stretch, but that’s the idea.

Step #4: Image Rotation
Now, rotate your image 180 degrees. Go to Image > Image Rotation > 180°

Yes, you should get an up and down image.

Step #5: Distort Effect
Go to Filter > Distort > Polar Coordinates…

Voilà!

Optional.- Add a Selfie on your Tiny Planet!
Working on this Tiny Planet concept I thought it will match with the composition if we include ‘Remy’ a cool character from Ratatouille Disney.